Selectively Sharing on Google+
This is the second part of a 3 part blog post in which I compare selectively sharing content on Facebook and Google+. In this post, I show how to selectively share content on Google+. This example assumes that you have created a circle called ‘Close Friends’.
Step 1. Log on Google+ and type your message.

Step 2: Remove the default circles by clicking the ‘x’ on each one.
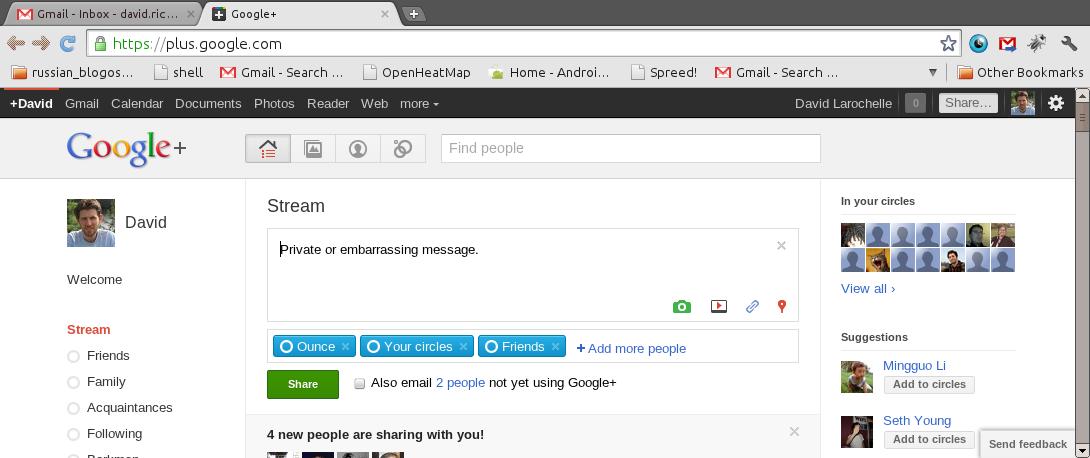
Step 3. Click the box that says ‘+Add circles or people to share with…’

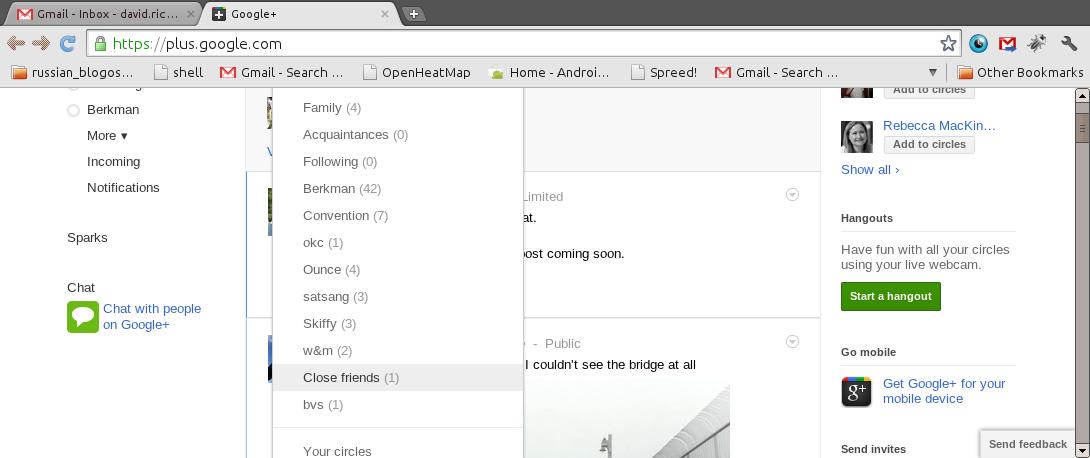
Step 4. Since ‘Close friends’ doesn’t initially show up in the drop down menu, we need to click ’10 more…’. (If ‘Close friends’ had appeared we could have skipped to the next step.)

Step 5. Click ‘Close friends’ in the drop down menu.
Step 6. Verify that the message is being shared with the people that you expected by glancing at the circles in the box under the message text. After, you’ve confirmed that the message is being shared with the right circle(s), click ‘share’ to publish it.

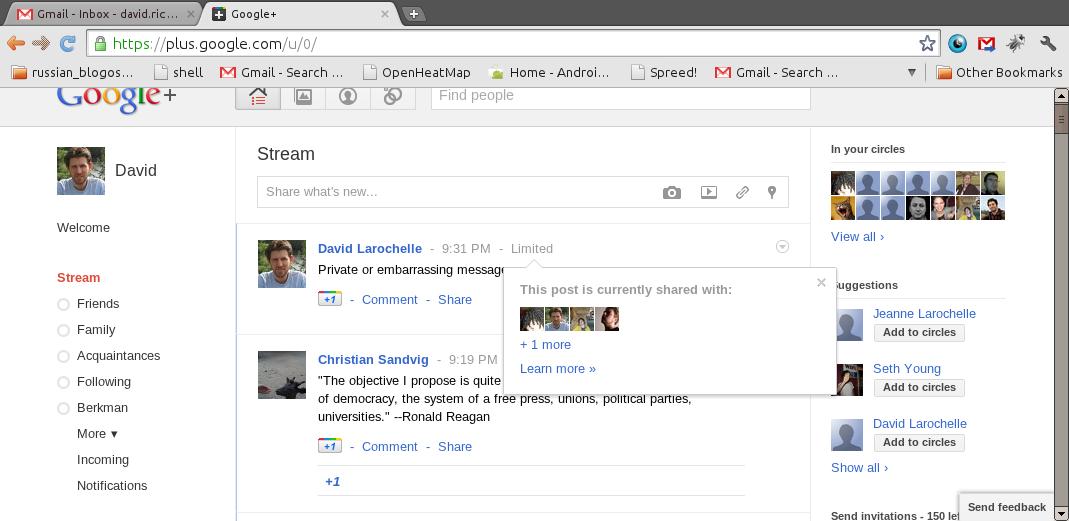
Step 7. After the message has been published, you can check who it’s being shared with by clicking the text that says ‘Limited’.

Step 8. Google+ pops up a box showing small profile pictures of everyone with whom the post is shared. Mousing over these small pictures causes Google+ to show the person’s name and a larger picture.
Note: As far as I was able to determine, once a post is shared, there is no way to change which users are able to see it. Thus if you shared with the wrong set of users, the only thing to do is delete and repost.